Party 104-9 (2004)
Saturday, October 18, 2014
Mix Tape 2004 (9-12/2004)
This tape is recorded on KBXX-FM Houston and KPTY-FM Houston. Gotta here this jam clip
THE MIXES WITH A GOOD COMBINATION 2004
The Clip mixes from September 2004 to December 2004. You gotta like, these where my jam.
BEYONCE' JAY-Z BACK TO BACK mixshow + R. Kelly
Beyonce hit song "Me, Myself and I" came first. You know you like it from the begin.
Jay-Z came too in the mix, but it with R. Kelly in "Best of Both worlds"
Jay-Z came too in the mix, but it with R. Kelly in "Best of Both worlds"
Wednesday, October 8, 2014
MY EXAMPLE HOW IS REALLY DONE!!!
Users, have you try it like to told you????
If not you will show you how is done, is not only short clips, it is a long clips like this
https://soundcloud.com/user972115009/sunny-991-intershow-2002
"Sunny 99.1" (2002) Zoe Boney Lovesongs
If not you will show you how is done, is not only short clips, it is a long clips like this
https://soundcloud.com/user972115009/sunny-991-intershow-2002
"Sunny 99.1" (2002) Zoe Boney Lovesongs
Sunday, August 3, 2014
TRY THIS NEXT ONE: Both sides (2 Sides) Tape
If you got the one side in a tape, then try both sides in a tape is just exactly the same thing, but another side is added.


One any of the audio software you got, press the PAUSE button, so you can turn your tape over. Is the two little rectangle sign. I know will take long to save it, but remember be patients so it can run good as it gets.
One any of the audio software you got, press the PAUSE button, so you can turn your tape over. Is the two little rectangle sign. I know will take long to save it, but remember be patients so it can run good as it gets.
Assignment: Try this: One full side tape

1. Look for any of the your audio tapes. It does not matter which one in the following
- 30 Minutes (60 Minute Tape)
- 45 Minutes (90 Minute Tape)
- 37 1/2 minutes (75 Minute Tape)
- 50 Minutes (100 Minute Tape)
- 55 Minutes (110 Minute Tape)
- 60 Minutes (120 Minute Tape)
- Others
3. Insert your tape, and press PLAY. Press RECORD to start.
4. After this is done press the export to save it, if this is your 1st file to save, export it find the LAME mp3 in your file to export it. The rest of it is no problem.

Connect it and start it with Volume Control /Sound Recorder
Users, a reminder that DJ's are not going to give you their tapes and others, you have to figure how you can get it yourself by recording your audio tapes and other media device from radio. Just listen to this carefully, because the people are were working at the radio station near you, i think they can't copy every audio clips, but if you have much on tape, that's good. If you don't have any at all at home, take a hike and search for old audio tapes at the thrift stores or resale stores anywhere. This is business.
Anyway, here's your materials to start.
BOOM BOX

DECK TAPE/TAPE PLAYER

A/V cable

L/R cable with audio connector

Mp3 cable

Headphones
Finally, your audio tapes

DIRECTIONS
1. Find the materials
2. Find one of your audio tapes, insert them to test them.
3. Use one of the connection to connect them to the computer
4. Plugging it on Line In is mostly work on Windows Vista, but the Microphone mostly work on Windows XP.
5. Are you ready to test it.
6. Before you do, open up volume control. Go into FILE and click in properties. After clicking on properties switch it to recording control. When you go on recording control, go and select MICROPHONE. It is good on Windows XP. After you select microphone close properties and close the volume control.
 7. Don't forget to bring down the dial on volume control.
8. Now open up sound recorder
 9. Press the PLAY button on your tape player. And press RECORD on the sound recorder. This software is up to 1 minute to be tested.
10. After your done and the project is good, save your file.
11. Play and see if you are ready to go on to either audio recording software like Jetaudio, Audacity or Mp3 recording software like Super Mp3 Recorder.
12. If is perfect, you are ready to go, there is no limit how much sound you put. If you are doing save or export them as Mp3 file (s).
Thank You and enjoy it
Anyway, here's your materials to start.
BOOM BOX
DECK TAPE/TAPE PLAYER
A/V cable
L/R cable with audio connector
Mp3 cable
Headphones
Finally, your audio tapes
DIRECTIONS
1. Find the materials
2. Find one of your audio tapes, insert them to test them.
3. Use one of the connection to connect them to the computer
4. Plugging it on Line In is mostly work on Windows Vista, but the Microphone mostly work on Windows XP.
5. Are you ready to test it.
6. Before you do, open up volume control. Go into FILE and click in properties. After clicking on properties switch it to recording control. When you go on recording control, go and select MICROPHONE. It is good on Windows XP. After you select microphone close properties and close the volume control.
8. Now open up sound recorder
10. After your done and the project is good, save your file.
11. Play and see if you are ready to go on to either audio recording software like Jetaudio, Audacity or Mp3 recording software like Super Mp3 Recorder.
12. If is perfect, you are ready to go, there is no limit how much sound you put. If you are doing save or export them as Mp3 file (s).
Thank You and enjoy it
MATERIALS TO BE USE PART 2
My 4th exhibition to show you is
Audio Connector
 Audio Connectors plays a role starting with a headphone jack in front of your boom box. Also it attaches with L/R audio cable, A/V cable and more
Here's what i'm talking about in those pictures
L/R audio cable with the audio connector
You really have to use this the connect to your stereo, boom box, you name many as you think of. Here's the exhibition containing this part.
 The picture may be the one i'm talking but it works exactly, the same like L/R audio cable, and A/V audio cable.
Portable cassette tape player
 It feels like you have to used it as the following with these choices

My 5th "important materials if you are trying to connect with the big headphone connection in front of your stereo is Big Headphone(earphone) jack
 The jack is used to connect with and attach to your mp3 cable, A/V cable, or audio connector. How that will do about all of it.
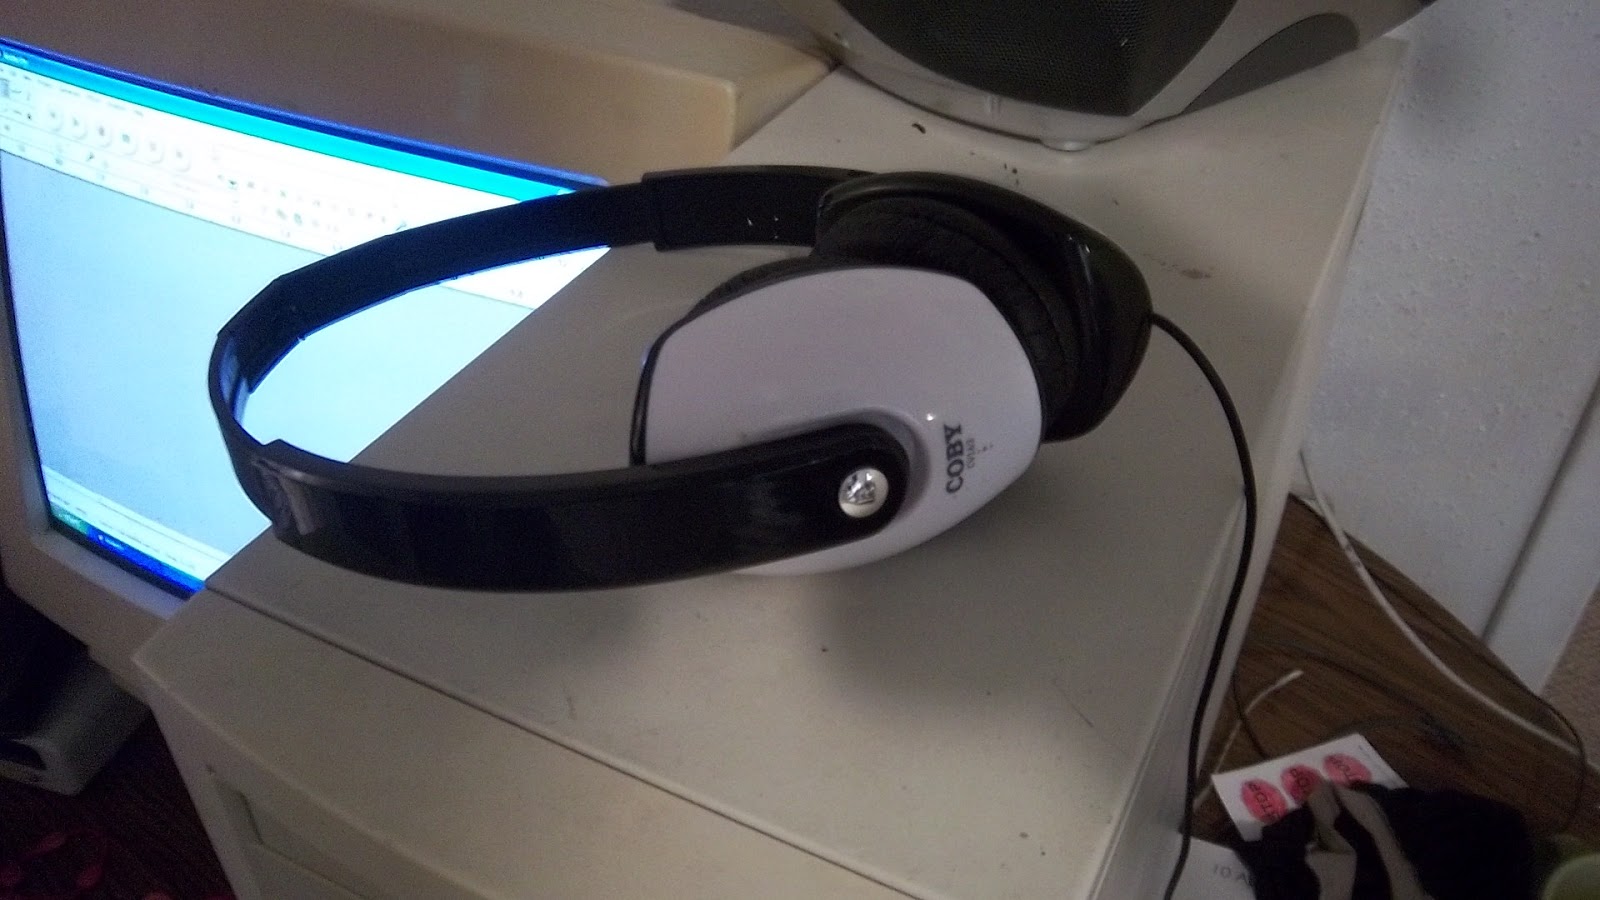
My 6th exhibition is headphone. It doesn't matter is a headphone is big or small is just the same so your the only one to here and make it good to share.
If you are lazy to used a headphone, and want to here it like is speaker, my 7th exhibition is computer speaker. Both speaker and headphone are simple to plug it in to the speakphone jack (green button)
 I'll show you the back of the computer of the following
a. Speakerphone (light green)
b. Microphone (pink)
c. Line-In (light blue)
 Now you know what you see,
Now get busy!!!
Audio Connector
Here's what i'm talking about in those pictures
L/R audio cable with the audio connector
Portable cassette tape player
- 2 audio connectors with a L/R audio Cable
- 1 audio connector with a A/V cable
My 5th "important materials if you are trying to connect with the big headphone connection in front of your stereo is Big Headphone(earphone) jack
My 6th exhibition is headphone. It doesn't matter is a headphone is big or small is just the same so your the only one to here and make it good to share.
a. Speakerphone (light green)
b. Microphone (pink)
c. Line-In (light blue)
Now get busy!!!
Saturday, August 2, 2014
MATERIALS TO BE USE PART 1

Yeah, audio tapes are the one that are first used to record audio clips from your radio or CD player. So you know that it may be your memory from the start. Please do not throw it away because I have to give it to you right now..
The first material that play a role to retrieve it is
MP3 CABLE
If Mp3 is not good enough. My next exhibition is A/V cable (yellow/white audio cable).
This material plays a role on stereos, boom boxes and tape deck players. Them three connect connect at the back of them. You do the same as every audio cable to be plug on either microphone or line in on the computer.
3rd exhibition is (L/R) Left/Right cable (red/white audio cable)


Reminder to Users
Users, users, users, please don't be playing around.
TIME IS RUNNING OUT
My goal to you is to teach you how to convert your audio into MP3.
Please listen to a person who has been practicing how I convert my audio tapes into Mp3. I test it first on Sound Recorder inside Windows 98, windows 2000, windows XP, and Windows vista.
Here's a picture what i'm talking about.

Please, please, please read it so you know about this.
Sound recorder is just a test if it works good, before going on to either audio recording software such as
 The Volume Control will give you recording control inside it. The properties is used to select Microphone (mic volume), Line-In and more in the Recording Control

After it is set, exit it by pressing the X button on the right end.
TIME IS RUNNING OUT
My goal to you is to teach you how to convert your audio into MP3.
Please listen to a person who has been practicing how I convert my audio tapes into Mp3. I test it first on Sound Recorder inside Windows 98, windows 2000, windows XP, and Windows vista.
Here's a picture what i'm talking about.
Please, please, please read it so you know about this.
Sound recorder is just a test if it works good, before going on to either audio recording software such as
- Audacity
- Super Audio Recorder
- Super Mp3 recorder
After it is set, exit it by pressing the X button on the right end.
Subscribe to:
Posts (Atom)